


My son loves chocolate and I love doing crafty things, so a “make your own emoji chocolate bars” kit sounded like the perfect blend of two of our favorite things. It looks fun! It looks easy! We got this! …or do we?
The chocolate that comes in the kit is plain milk chocolate, but you can level it up with ingredients like nuts and spices to make it even more fun and flavorful. Just be sure to check if the ingredient you’ll be adding is safe for kids. You can check this blog from Serenity Kids that explains if cinnamon is a safe for children.

We started with this Chocolate Emoji Maker kit compliments of Zimpli Kids. It’s actually no longer available. You can probably see why at the end of the post when you check out our finished product. It looks like it’s going to be easy, but the final results are not so pretty.
The directions are pretty simple: Melt chocolate, squirt on templates, refrigerate for 20 minutes, then eat your chocolatey masterpiece. So let’s get started!
How to Make Your Own Chocolate Emoji Bars
Step 1 – Prepare your emoji template
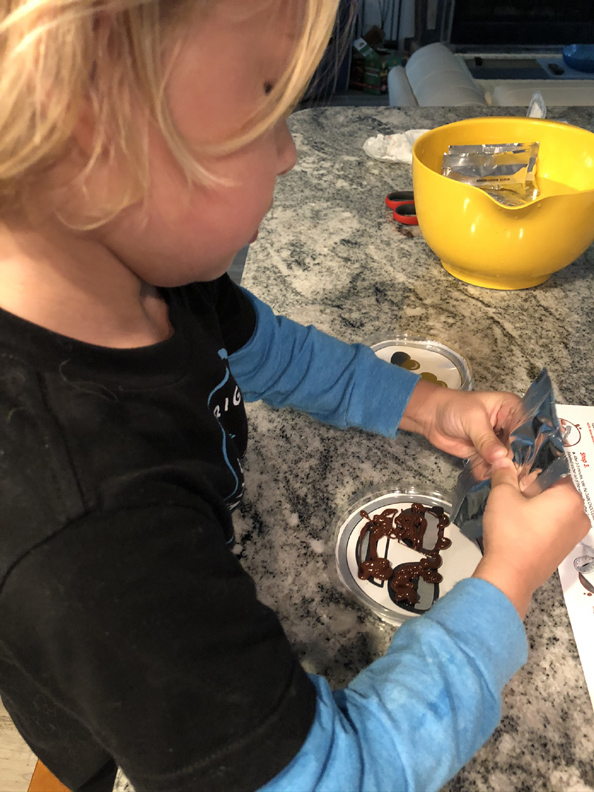
There are six different designs to choose from, each rated by difficulty. Choose your emoji template and cut it out. Each kit comes with enough chocolate to make two bars, so my son chose the sunglasses emoji for himself, and he picked out the hearts for me.


Step 2 – Melt the chocolate
Put the chocolate packets in a large bowl full of warm water. You don’t need to heat it on the stove or get it really hot. Plain warm water from the tap will work. Once you let them sit for a minute, you’ll want to knead them and help squash out all the lumps until it’s nice and smooth.

If you don’t have a kit, you can always make it from scratch. First, choose a good melting chocolate. Choose one with a higher cocoa content because it tends to melt more smoothly and easily than chocolate with a lower one. This is because cocoa butter, the natural fat found in cocoa beans, has a lower melting point than the other fats found in chocolate.
Aside from how fast the chocolate melts, another thing is to choose high-quality chocolate. Higher-quality chocolate is made with pure cocoa butter and high-quality cocoa beans. It tends to melt more smoothly and evenly than lower-quality chocolate made with cheaper ingredients.
You can melt the chocolate using three methods- stovetop, microwave, or double-boiler. If you’re going to use the microwave, heat the chocolate on medium power in 20 to 30-second increments, stirring after intervals, until the chocolate is fully melted and smooth. (I recently tried this and didn’t know to stir every 30 seconds and actually burned the chocolate! So the stirring is important.)
Step 3 – Snip the end and start drawing
The kit comes with three flavors- dark, white and milk chocolate. Start with the dark chocolate and cut the corner off just a little so the chocolate comes out nice and fine. You’ll use the dark to go over the black lines, the white for the white parts, and then you fill in the rest with the milk chocolate. It’s harder than it sounds.
Step 4 – Put it in the fridge to set
Once your masterpiece is complete, put it in the fridge to harden into a delicious Belgian chocolate emoji bar. It takes about 20 minutes, then you flip the little plastic tray over to reveal the beautiful emoji faces:

I can promise you ours tasted better than they looked! The chocolate was a little hard to control, and they sure didn’t look pretty, but it was fun to do and even more fun to eat afterwards! Unfortunately, this kit is no longer available, but you can do the same thing by using melted chocolate and emoji molds.
Categories: Dessert, Food & Recipe


😂 hilarious and also fun. Love it!
LikeLike
Oh yummy!
LikeLike
This is so much fun isn’t it?!
LikeLike
Fun but harder than we thought to get it look right lol
LikeLike
Haha! Bella kept bumping into me too, right at the crucial points 😂
LikeLike