


I went for a retro WWII Captain America cosplay look from Captain America: The First Avenger and recreated the heater shield using foam and Worbla. This type of shield is based on a type of European medieval shield, was given the name “heater shield” due to the shape resembling the bottom of a clothes iron.

Cosplay Tutorial: Captain America’s Heater Shield
Pattern and Cut Out Shield
I drew out the shape on a big piece of paper first. The shield can be customized to size. My goal was to make something realistically sized, but lightweight. I had recently done a Zelda cosplay and tried to lug around a resin molded Master Shield all night and that thing was HEAVY. So for this I went with a thick (but very lightweight) foam core board and put a single layer of Worbla over it to make it more durable. You can cover it with any type of thermoplastic or even another layer of foam if you prefer. I got the foam board at Hobby Lobby and Worbla can be found on Amazon.
I started with my paper pattern, and then traced it onto the foam board. Because the board is pretty thick, I used a utility knife to cut out the shape.


Makes Holes and Attach Straps
I figured out where I wanted to place the straps so I could easily attach the shield to my arm. Using the utility knife, I cut out four holes. It’s OK if these aren’t perfect- nobody will see them! Next I threaded a wide elastic through the holes and hand stitched them to secure the handle loops. Before sewing them, make sure you pick up the shield and double check that the elastic is tight enough to hold the shield the way you want.


Cover the Straps
The next step is to cover the front side with poster board. This can be any color, because you’re going to cover it up. The reason for doing this is to make it smooth when you add the Worbla. Otherwise, the surface will be lumpy where the straps go through.

Add the Worbla Layer
Next cut a piece of Worbla larger than the shield. You’ll heat this up and wrap it around the edges. Putting cuts around the edges will help it wrap around more smoothly. I used a roller and wax paper to smooth out all the lumps and bubbles. The wax paper is so the Worbla doesn’t stick to the roller.


Sand and Prep Your Shield
The next step is to sand the Worbla smooth and then apply your base layer of white color. I used Gesso for this step, which smooths and preps the surface for painting. Two or three layers will make it nice and smooth, and bright white.

Tape Out the Design with Painter’s Tape and Star Stickers
First thing I did was cover the bottom half and paint the top blue with spray paint. To make the stars, I printed them out on label paper- the kind with the sticker backing, and stuck them on before painting.
Next I carefully covered the top part and used painter’s tape to create the spaces for the red stripes.


Spray Paint the Red Stripes
Next I spray painted the red stripes and let everything dry really well before removing the tape. The final step was to spray it with a clear gloss coat to protect the paint finish and make the flat Gesso parts match the glossy spray paint.

To complete the look, I got a real WW2 helmet and spray painted it. The ammo belt and spats are WW2 replicas I found on eBay. So here’s the final look for my Retro Captain America cosplay:

The shield design was a success- I was able to carry it around all night without it being too heavy! And overall the costume was very comfortable to wear.
About the Author
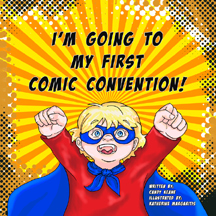
Candy Keane is a digital content creator and long-time cosplayer, most well-known for being on the cover of the Star Wars documentary Jedi Junkies. After making costumes professionally for over a decade, she now writes about geek culture and mom life, and continues for cosplay for fun, while sharing her love of costumes on Instagram @SewGeekMama. Her first children’s book, I’m Going to My First Comic Convention, was published in 2020 and won a Story Monsters Approved award for Excellence in Literature.

Categories: Tutorials, Foamcraft, Thermoplastics


This is a great tutorial! What would you estimate as the overall cost for the shield?
LikeLiked by 1 person
Thanks! The most expensive part is the Worbla. I get the large sheets and cut them down, so I used about $20 worth. But to buy just enough for this would probably be more like $40. The foam board and paint are under $5 each. Overall I spent maybe $50 to make it. Pretty good deal since this style is much harder to find to buy, and the replicas on Etsy are going for about $300!
LikeLiked by 1 person